Step 1: Take Stock of What You Actually Use
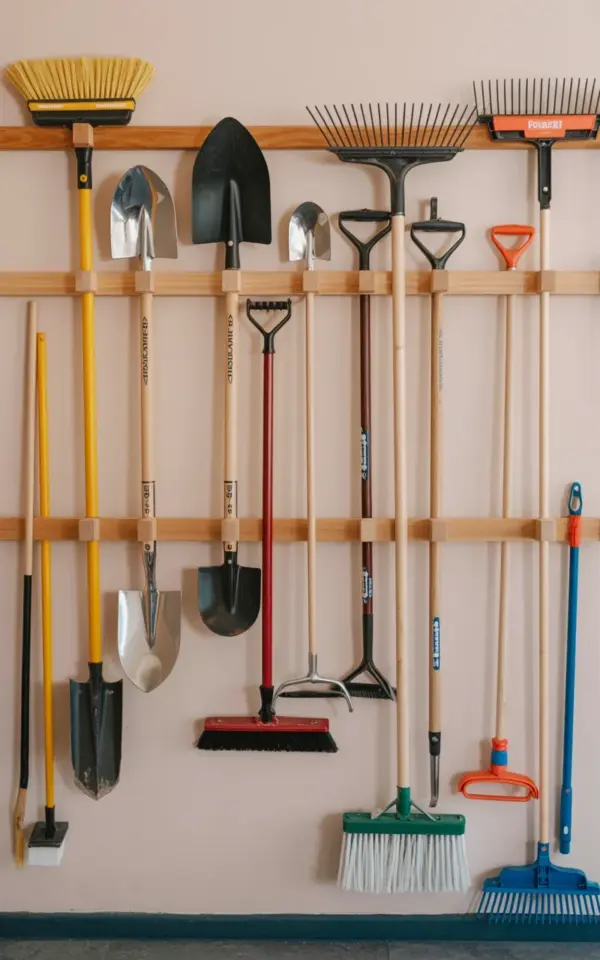
Before you drill a single hole, stand in your mudroom or entryway and look at the tools you reach for most. In the photo that inspired this post, the setup includes a long yellow broom, metal shovels with black handles, a red-handled spade, a black push broom, and a few rakes with metal tines. That is a realistic mix of everyday sweepers and heavier digging tools. I have found that the biggest mistake people make is buying a peg rack and then trying to cram every odd shovel and rake they own onto it. Instead, pull out only the tools you use at least once a week. Leave the seasonal leaf rake and the pitchfork for the garage. A focused collection keeps the wall look neat and prevents the rack from becoming a cluttered mess.
For a farmhouse kitchen cleaning tool storage system, you want items that pull double duty. A good quality broom with a bright yellow head (like the one in the photo) is both functional and a pop of color against a light beige wall. The red spade adds a similar accent. Stick to tools with consistent handle lengths so the horizontal row stays visually balanced. If your push broom has a bent handle or your rakes are mismatched, consider whether they belong on display or tucked away in a closet.
Step 2: Pick a Peg Rack That Matches Your Wall and Tools
The rack in the image is a series of wooden pegs mounted directly into the wall, spaced evenly to hold each tool separately. That is the key to a good peg rack organizer for mudroom use. You want pegs that are long enough to hold a heavy shovel without wobbling, but not so thick that a broom handle slides off. I prefer pegs that are at least three inches long and made from solid wood. Pine or oak works well because they can be stained or painted to match your existing trim.
If you are handy, you can make your own rack by cutting dowels and screwing them into a wooden backboard. But if you want a quicker solution, buy a pre-made farmhouse-style rack with a distressed finish. Just make sure the peg spacing matches the width of your tool handles. For a typical broom and spade setup, space the pegs about six to eight inches apart. That gives each tool its own spot without crowding.
Step 3: Mount It Securely on Your Wall
- Find the studs. Use a stud finder to mark your wall studs. Heavy shovels and a push broom can pull a rack out of drywall anchors over time. For the setup in the photo, those metal shovels and the black push broom have real weight. Screwing into at least two studs is non-negotiable.
- Level, level, level. A crooked peg rack screams “I rushed this.” Use a four-foot level to mark your mounting line. Even a slight tilt will make the tools hang at an angle, which ruins the neat horizontal row you see in the image.
- Pre-drill and use the right screws. Wood pegs split easily if you drive screws in without a pilot hole. Use a drill bit slightly smaller than your screw diameter. For a rack that holds tools like the red spade and rakes, go with at least two-inch screws into studs.
If your wall is drywall without studs in the ideal spot, use heavy-duty toggle bolts rated for at least fifty pounds. Test the rack by tugging downward on each peg before you declare it done.
Step 4: Arrange Your Tools by Weight and Frequency of Use
Look at the photo again: the tools are arranged in a systematic pattern. The lighter yellow broom and black push broom sit on the ends, while the heavier spade and metal shovels are spaced in the middle. That is smart physics. Heavier items in the center put less torque on the rack ends and keep everything balanced. I always hang my most-used tool
#farmhouseorganization #kitchencleaningstorage #mudroomideas #rusticdecor #pegrackorganizer
Leave a Comment